Basics: Solidity Data Types
Before we jump into creating smart contracts, we need to understand the basic data types in Solidity.
1. uint (Unsigned Integer)
A non-negative integer that can store whole numbers starting from 0.
uint age = 30;           // set

function getAge() public view returns (uint) {
    return age;          // retrieve
}
2. int (Signed Integer)
Stores whole numbers that can be both negative and positive.
int temperature = -5;

function getTemp() public view returns (int) {
    return temperature;
}
3. string
Stores a sequence of characters (text).
string public name = "Alice";

function getName() public view returns (string memory) {
    return name;
}
4. bool (Boolean)
Holds a true or false value.
bool public isActive = true;

function getStatus() public view returns (bool) {
    return isActive;
}
5. address
Holds a 20-byte Ethereum address.
address public user = 0xAb...123;

  function getUser() public view returns (address) {
    return user;
}
6. bytes / bytes1 to bytes32
Stores fixed-size or dynamic raw byte data.
bytes32 public hash = keccak256(abi.encodePacked("data"));

  function getHash() public view returns (bytes32) {
    return hash;
}
7. enum
Custom type representing a group of named constant values.
enum Status { Pending, Shipped, Delivered }

  Status public orderStatus = Status.Pending;

function getStatus() public view returns (Status) {
    return orderStatus;
}
8. struct
Custom type to group related variables under one name.
struct Person {
    string name;
    uint age;
}

Person public p = Person("Ali", 25);

function getPerson() public view returns (string memory, uint) {
    return (p.name, p.age);
}
9. array
Stores a list of elements of the same type, either fixed or dynamic.
uint[] public numbers = [1, 2, 3];

function getNumber(uint index) public view returns (uint) {
    return numbers[index];
}
10. mapping
Key-value store, like a dictionary.
mapping(address => uint) public balances;
function setBalance(address user, uint value) public {
    balances[user] = value;
}

  function getBalance(address user) public view returns (uint) {
    return balances[user];
}
Creating Smart Contracts for Project and Sprint Entities | Prequisites
Before we jump into the development, we need to take care of two Pre-requisite tasks:
1: First of all let’s create a folder called contracts as shown:
mkdir <DJANGO-ROOT-FOLDER>/contracts
DJANGO-ROOT-FOLDER is the folder that contains the manage.py file.
2: We will also need to create .env file to store sensitive information. Please create it in the <DJANGO-ROOT-FOLDER>.
GANACHE_URL=http://x.x.x.x:8545
GANACHE_ACCOUNT=0xYourGanacheAccountAddress
GANACHE_PRIVATE_KEY=0xYourGanachePrivateKey
Creating Smart Contracts for Project Entity | Key Steps
Step #1: Create the Struct to match Django’s Project Model
In Solidity, we use a struct to define a custom data type. This is equivalent to defining a "record" or "row" in Django.
struct Project {
  uint id;
  string projectName;
  uint customerId;
  string projectDescription;
  uint256 projectStart;
  uint256 projectEnd;
  uint256 projectActualStart;
  uint256 projectActualEnd;
  bool completed;
  uint projectManagerId;
  uint256 createdOn;
  uint256 updatedAt;
}
Step #2: Store Projects in a Mapping
To store all projects on-chain, we use a mapping, which is Solidity’s way of storing key-value pairs (like a Python dictionary).
mapping(uint => Project) public projects;

uint public projectCount = 0;
Step #3: Add a Function to Create Projects
Here we define a createProject() function. It takes the same fields as the struct, saves them in the projects mapping, and emits an event.
function createProject(
  string memory projectName,
  uint customerId,
  string memory projectDescription,
  uint256 projectStart,
  uint256 projectEnd,
  uint256 projectActualStart,
  uint256 projectActualEnd,
  bool completed,
  uint projectManagerId,
  uint256 createdOn,
  uint256 updatedAt
) public
{
  projectCount++;
  projects[projectCount] = Project(...);
  emit ProjectCreated(...);
}
Step #4: Emit Events for Transparency
We emit a ProjectCreated event so external applications (like a frontend or Django app) can listen for new records on-chain.
event ProjectCreated(
  uint id,
  string projectName,
  uint customerId,
  string projectDescription,
  uint256 projectStart,
  uint256 projectEnd,
  uint256 projectActualStart,
  uint256 projectActualEnd,
  bool completed,
  uint projectManagerId,
  uint256 createdOn,
  uint256 updatedAt
);
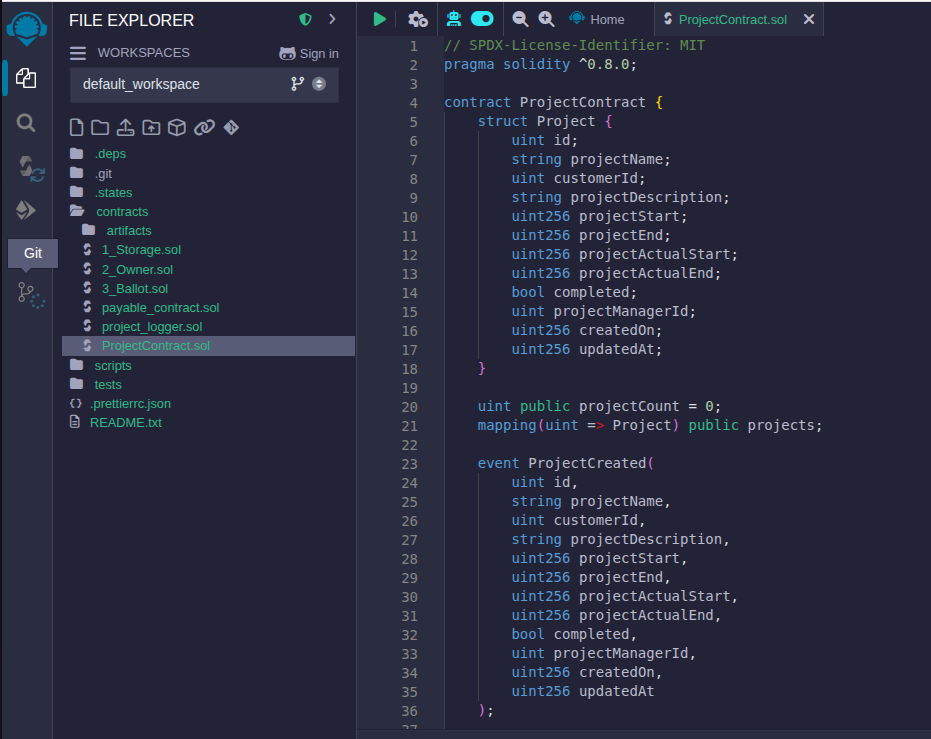
Step #5: Complete Code for Project Contract
Here is the complete code is shown below. Let’s store it in a file called ProjectContract.sol inside <DJANGO-ROOT-FOLDER>/contracts
// SPDX-License-Identifier: MIT
  pragma solidity ^0.8.0;

  contract ProjectContract {
      struct Project {
          uint id;
          string projectName;
          uint customerId;
          string projectDescription;
          uint256 projectStart;
          uint256 projectEnd;
          uint256 projectActualStart;
          uint256 projectActualEnd;
          bool completed;
          uint projectManagerId;
          uint256 createdOn;
          uint256 updatedAt;
      }

      uint public projectCount = 0;
      mapping(uint => Project) public projects;

      event ProjectCreated(
          uint id,
          string projectName,
          uint customerId,
          string projectDescription,
          uint256 projectStart,
          uint256 projectEnd,
          uint256 projectActualStart,
          uint256 projectActualEnd,
          bool completed,
          uint projectManagerId,
          uint256 createdOn,
          uint256 updatedAt
      );

      function createProject(
          string memory projectName,
          uint customerId,
          string memory projectDescription,
          uint256 projectStart,
          uint256 projectEnd,
          uint256 projectActualStart,
          uint256 projectActualEnd,
          bool completed,
          uint projectManagerId,
          uint256 createdOn,
          uint256 updatedAt
      ) public {
          projectCount++;
          projects[projectCount] = Project(
              projectCount,
              projectName,
              customerId,
              projectDescription,
              projectStart,
              projectEnd,
              projectActualStart,
              projectActualEnd,
              completed,
              projectManagerId,
              createdOn,
              updatedAt
          );

          emit ProjectCreated(
              projectCount,
              projectName,
              customerId,
              projectDescription,
              projectStart,
              projectEnd,
              projectActualStart,
              projectActualEnd,
              completed,
              projectManagerId,
              createdOn,
              updatedAt
          );
      }
  }
Creating Smart Contracts for Sprint Entity
Using the above mechanism, we will create a contract for the Sprint entity. The final code is given in the following section. Let’s call this file SprintContract.sol and we should store it in <DJANGO-ROOT-FOLDER>/contracts.
// SPDX-License-Identifier: MIT
pragma solidity ^0.8.0;

contract SprintContract {
    struct Sprint {
        uint id;
        uint projectId;
        uint customerId;
        uint projectManagerId;
        uint256 sprintStart;
        uint256 sprintEnd;
        string sprintDescription;
        uint estimatedHours;
        uint totalItems;
        uint totalCompleted;
        uint256 createdOn;
        uint256 updatedAt;
    }

    uint public sprintCount = 0;
    mapping(uint => Sprint) public sprints;

    event SprintCreated(
        uint id,
        uint projectId,
        uint customerId,
        uint projectManagerId,
        uint256 sprintStart,
        uint256 sprintEnd,
        string sprintDescription,
        uint estimatedHours,
        uint totalItems,
        uint totalCompleted,
        uint256 createdOn,
        uint256 updatedAt
    );

    function createSprint(
        uint projectId,
        uint customerId,
        uint projectManagerId,
        uint256 sprintStart,
        uint256 sprintEnd,
        string memory sprintDescription,
        uint estimatedHours,
        uint totalItems,
        uint totalCompleted,
        uint256 createdOn,
        uint256 updatedAt
    ) public {
        sprintCount++;
        sprints[sprintCount] = Sprint(
            sprintCount,
            projectId,
            customerId,
            projectManagerId,
            sprintStart,
            sprintEnd,
            sprintDescription,
            estimatedHours,
            totalItems,
            totalCompleted,
            createdOn,
            updatedAt
        );

        emit SprintCreated(
            sprintCount,
            projectId,
            customerId,
            projectManagerId,
            sprintStart,
            sprintEnd,
            sprintDescription,
            estimatedHours,
            totalItems,
            totalCompleted,
            createdOn,
            updatedAt
        );
    }
}
Compile the Contracts
1. Load Remix UI in your favorite browser by visiting: Remix UI
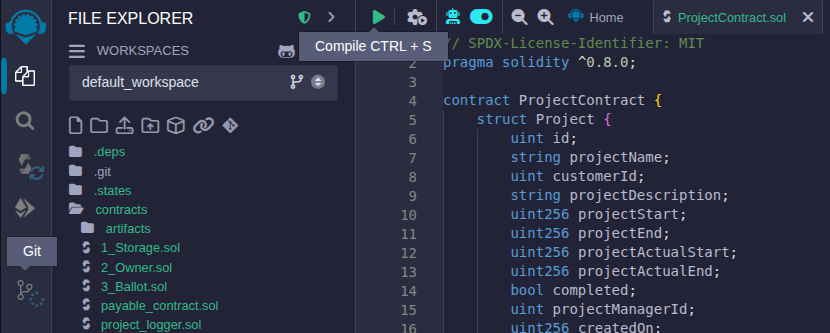
2. Open our Project Contract file - ProjectContract.sol in Remix
3. Compile the newly created contract
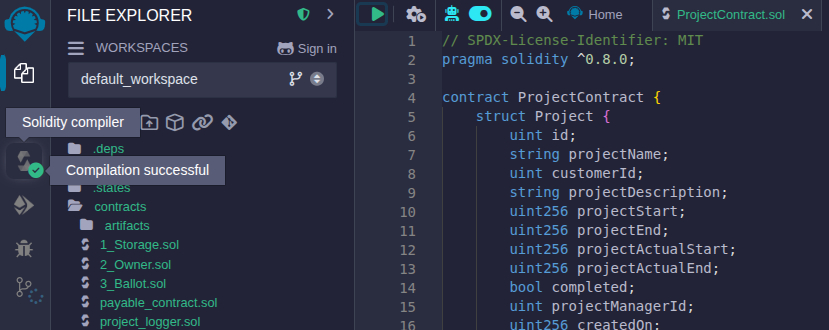
4. You will see that Compilation Successful method.
5. Now go to Compilation screen and click ‘Compilation Details’ button.
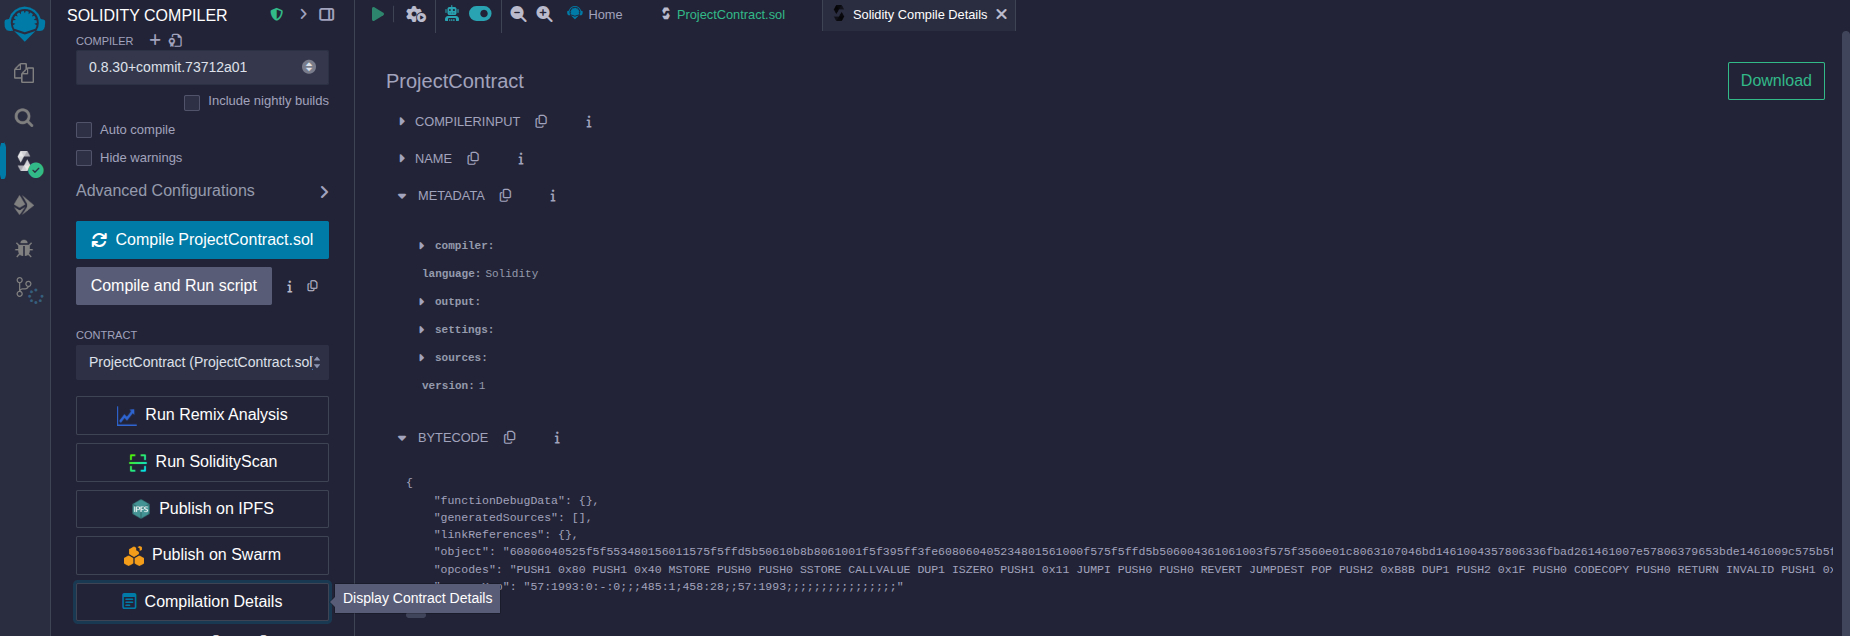
6. Click on ‘ABI’ button to copy ABI to clipboard
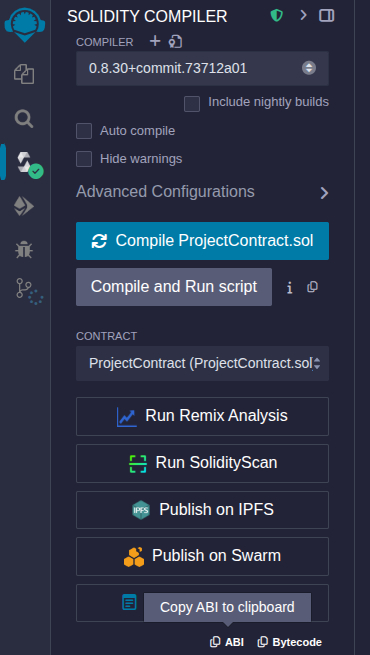
7. Now store this as ProjectContract.json inside <DJANGO-ROOT-FOLDER>/contracts
8. Similarly, click on ‘Bytecode’ button to copy Bytecode to clipboard
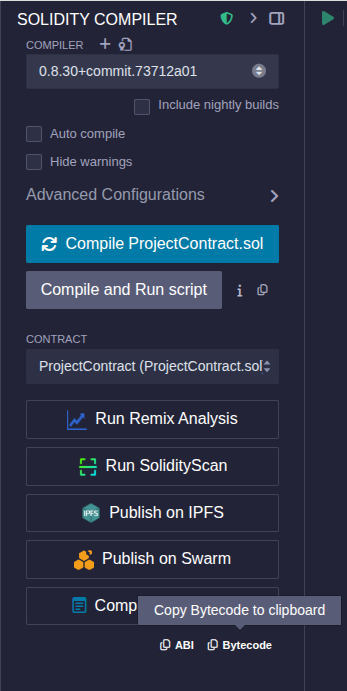
9. Store bytecode as ‘ProjectContract.bytecode’ inside <DJANGO-ROOT-FOLDER>/contracts
Similarly, repeat the above process for SprintContract as well. Please store Sprint's ABI in SprintContract.json and Sprint's Bytecode in SprintContract.bytecode.
Deploy the Contracts
For the purpose of this blog, let’s deploy both Project and Sprint contracts using Remix UI. Please refer to the previous blog (link for detailed instructions) on how to deploy a contract using Remix.
Once a contract has been deployed, you will need to copy its address from Remix’s UI as shown in the following screenshot:
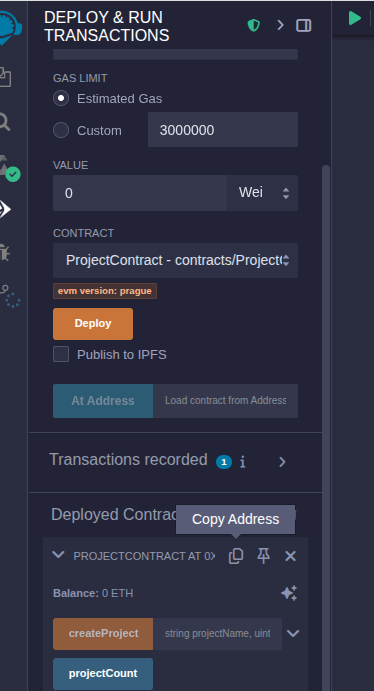 Repeat the process for Sprint contract as well. Make sure you keep the copied address(es) in a safe place. Let’s store them in our .env file.
Note, if you stop the running ganache network. You will lose the deployed contract. Redeployment will result in a new address.
Creating Project Entity Django Blockchain Integration Code
Now let’s create a Django file in the <DJANGO-ROOT-FOLDER</contracts called project_contract.py. This code consists of 4 logical blocks.
Block 1: Setup & Environment Loading
Loads necessary libraries and pulls values (like GANACHE_URL, account, private key, contract address) from a .env file to avoid hardcoding sensitive data.
import json
import os
from web3 import Web3
from django.conf import settings
from dotenv import load_dotenv

load_dotenv()  # Load environment variables from .env file

ganache_url = os.environ["GANACHE_URL"]
account = os.environ["GANACHE_ACCOUNT"]
private_key = os.environ["GANACHE_PRIVATE_KEY"]
project_contract_address = os.environ["PROJECT_CONTRACT_ADDRESS"]
Block 2: Blockchain Connection & Contract Initialization
Connects to a local Ethereum test network (Ganache) and prepares to interact with a deployed smart contract using its ABI and address.
w3 = Web3(Web3.HTTPProvider(ganache_url))  # Connect to local Ganache

abi_path = os.path.join(settings.BASE_DIR, 'contracts', 'ProjectContract.json')
with open(abi_path) as f:
    abi = json.load(f)  # Load ABI (Application Binary Interface)

contract_address = Web3.to_checksum_address(project_contract_address)
contract = w3.eth.contract(address=contract_address, abi=abi)
Block 3: Main Function to Push Project Data to Blockchain
Defines a function that takes a project object, maps its fields to the smart contract’s createProject method, and builds a transaction.
def push_project_to_chain(project):
tx = contract.functions.createProject(
    project.project_name,
    project.customer_id,
    project.project_description,
    int(project.project_start.timestamp()),
    int(project.project_end.timestamp()),
    int(project.project_actual_start.timestamp()),
    int(project.project_actual_end.timestamp()),
    project.completed,
    project.project_manager_id,
    int(project.created_on.timestamp()),
    int(project.updated_at.timestamp())
).build_transaction({
    'from': account,
    'nonce': w3.eth.get_transaction_count(account),
    'gas': 300000,
    'gasPrice': w3.to_wei('1', 'gwei')
})
Block 4: Sign, Send Transaction & Return Hash
Signs the built transaction with the private key, sends it to the blockchain, and returns the transaction hash for tracking.
    signed_tx = w3.eth.account.sign_transaction(tx, private_key)
print(signed_tx)

tx_hash = w3.eth.send_raw_transaction(signed_tx.raw_transaction)

return w3.to_hex(tx_hash)
Complete Code for project_contract.py
Here is the complete code for Django Integration code for BlockChain.
import json
import os
from web3 import Web3
from django.conf import settings

from dotenv import load_dotenv

# Load environment variables from .env file
load_dotenv()

# Use environment variables
ganache_url = os.environ["GANACHE_URL"]
account = os.environ["GANACHE_ACCOUNT"]
private_key = os.environ["GANACHE_PRIVATE_KEY"]
project_contract_address = os.environ["PROJECT_CONTRACT_ADDRESS"]

# Connect to Ganache
w3 = Web3(Web3.HTTPProvider(ganache_url))


# Connect to local Ganache
w3 = Web3(Web3.HTTPProvider(ganache_url))

# Load ABI
abi_path = os.path.join(settings.BASE_DIR,'contracts', 'ProjectContract.json')
with open(abi_path) as f:
    abi = json.load(f)

# Deployed contract address from Remix (Ganache network)
contract_address = Web3.to_checksum_address(project_contract_address)
contract = w3.eth.contract(address=contract_address, abi=abi)

# Main function to push data
def push_project_to_chain(project):
    tx = contract.functions.createProject(
        project.project_name,
        project.customer_id,
        project.project_description,
        int(project.project_start.timestamp()),
        int(project.project_end.timestamp()),
        int(project.project_actual_start.timestamp()),
        int(project.project_actual_end.timestamp()),
        project.completed,
        project.project_manager_id,
        int(project.created_on.timestamp()),
        int(project.updated_at.timestamp())
    ).build_transaction({
        'from': account,
        'nonce': w3.eth.get_transaction_count(account),
        'gas': 300000,
        'gasPrice': w3.to_wei('1', 'gwei')
    })

    signed_tx = w3.eth.account.sign_transaction(tx, private_key)
    print(signed_tx)
    tx_hash = w3.eth.send_raw_transaction(signed_tx.raw_transaction)
    return w3.to_hex(tx_hash)
Changes in the Models.py
We need to modify Project class in models.py. We need to add the followiung code. That will push information about the project to Blockchain when new project is created.
def save(self, *args, **kwargs):
  super().save(*args, **kwargs)
  tx_hash = push_project_to_chain(self)
  print(f"Pushed to blockchain: {tx_hash}")
Changes in the Views.py
Update method for proect_create. Replace it with the following code so that it explicitly calls save method of models.py (created in the previous section).
from contracts.project_contract import push_project_to_chain
def project_create(request):
if request.method == 'POST':
form = ProjectForm(request.POST)
if form.is_valid():
project = form.save() # This saves and returns the instance
try:
tx_hash = push_project_to_chain(project)
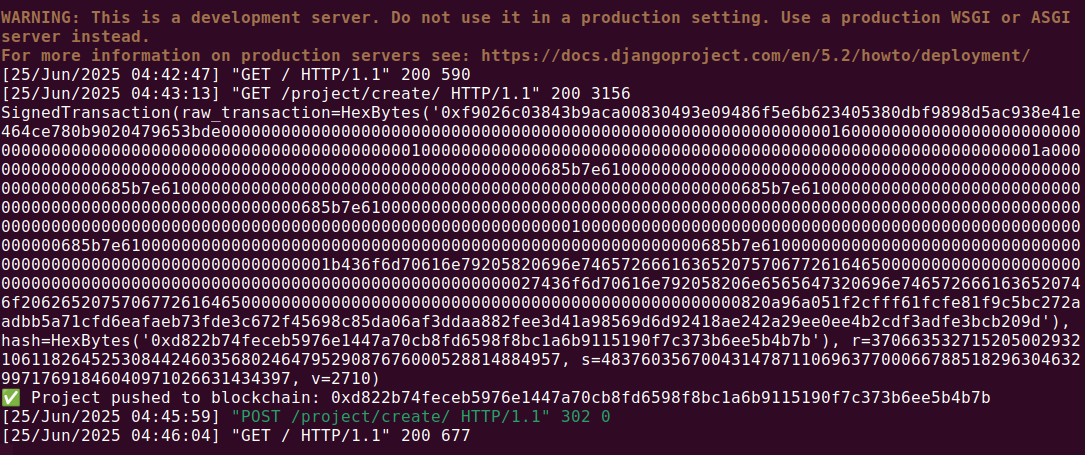
print(f"✅ Project pushed to blockchain: {tx_hash}")
except Exception as e:
print(f"⚠️ Blockchain push failed: {e}")
return redirect('project_list')
else:
form = ProjectForm()
return render(request, 'blockchain_sprint_manager/project_form.html', {'form': form})
Creating Sprint Entity Django Blockchain Integration Code
Now let’s create a Django file in the <DJANGO-ROOT-FOLDER</contracts called sprint_contract.py. The complete code is given in the following:
import os
import json
from web3 import Web3
from dotenv import load_dotenv
from pathlib import Path
from django.conf import settings

# Load environment variables
env_path = Path(__file__).resolve().parent.parent / ".env"
load_dotenv(dotenv_path=env_path)

# Load from .env
ganache_url = os.environ["GANACHE_URL"]
account = os.environ["GANACHE_ACCOUNT"]
private_key = os.environ["GANACHE_PRIVATE_KEY"]
contract_address = Web3.to_checksum_address(os.environ["SPRINT_CONTRACT_ADDRESS"])

# Connect to Ganache
w3 = Web3(Web3.HTTPProvider(ganache_url))
assert w3.is_connected(), "Web3 connection to Ganache failed"

# Load ABI
abi_path = os.path.join(settings.BASE_DIR, 'contracts', 'SprintContract.json')
with open(abi_path) as f:
    abi = json.load(f)

# Load the deployed contract
contract = w3.eth.contract(address=contract_address, abi=abi)

# Function to send Sprint data
def push_sprint_to_chain(sprint):
    tx = contract.functions.createSprint(
        sprint.project_id,
        sprint.customer_id,
        sprint.project_manager_id,
        int(sprint.sprint_start.timestamp()),
        int(sprint.sprint_end.timestamp()),
        sprint.sprint_description,
        sprint.estimated_hours,
        sprint.total_items,
        sprint.total_completed,
        int(sprint.created_on.timestamp()),
        int(sprint.updated_at.timestamp())
    ).build_transaction({
        'from': account,
        'nonce': w3.eth.get_transaction_count(account),
        'gas': 300000,
        'gasPrice': w3.to_wei('1', 'gwei')
    })

    signed_tx = w3.eth.account.sign_transaction(tx, private_key)
    tx_hash = w3.eth.send_raw_transaction(signed_tx.raw_transaction)
    return w3.to_hex(tx_hash)
Changes in the Models.py
We need to modify Sprint class in models.py. We need to add the followiung code. That will push information about the sprint to Blockchain when new sprint is created.
def save(self, *args, **kwargs):
# Save to database first
is_new = self.pk is None
super().save(*args, **kwargs)

# Push to Ethereum only for new entries
if is_new:
    try:
        tx_hash = push_sprint_to_chain(self)
        print(f"✅ Sprint pushed to Ethereum. TX Hash: {tx_hash}")
    except Exception as e:
        print(f"⚠️ Failed to push Sprint to blockchain: {e}")
Changes in the Views.py
We need to modify Sprint class in views.py. We need to explicitly call the save method for Sprint Class from models.py (one we created in the previous step).
from contracts.sprint_contract import push_sprint_to_chain

def sprint_create(request):
  if request.method == 'POST':
      form = SprintForm(request.POST)
      if form.is_valid():
          sprint = form.save()  # Save the Sprint instance
          try:
              tx_hash = push_sprint_to_chain(sprint)
              print(f"✅ Sprint pushed to blockchain: {tx_hash}")
          except Exception as e:
              print(f"⚠️ Blockchain push failed: {e}")
          return redirect('sprint_list')
  else:
      form = SprintForm()
  return render(request, 'blockchain_sprint_manager/sprint_form.html', {'form': form})
Testing our code
Let’s start the most exciting phase of our blog. That is, testing out our code.
1. We will start with starting out our server. Please browse to your Django Root folder (one that contains manage.py) and issue following command:
python3 manage.py runserver 0.0.0.0:80

2. Open up your favorite Web Browser and enter the URL for your Django Application. E.g., in my case it is: http://35.226.208.133
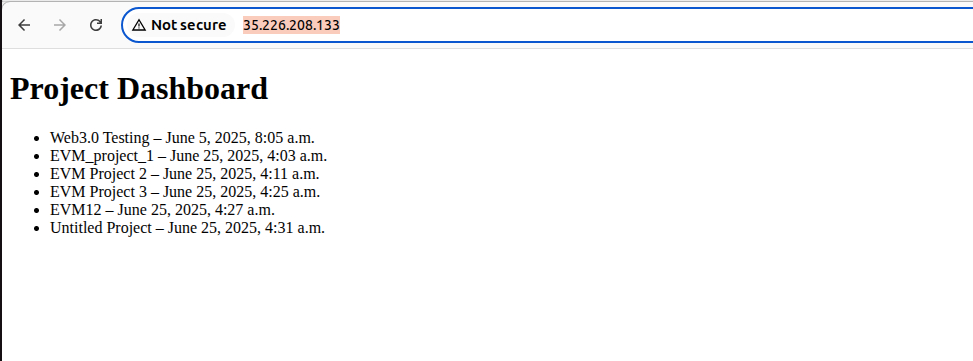
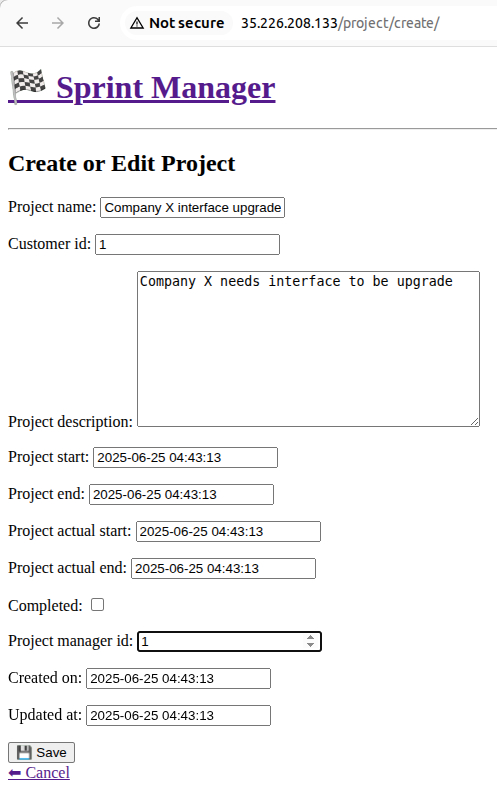
3. Now browse to the http://35.226.208.133/project/create/ page to add a new project.
4. Add data and then click on ‘Save’ button
5. Check the Django command line output to see if project data is successfully written to Blockchain.
6. Similarly, check the command line output of ganache Blockchain, you will see information about the inserted block

7. Similarly, repeat the process for sprint creation. Browse to http://35.226.208.133/sprint/create/, add relevant information and save to create the new sprint. This data will be pushed to the block chain.
Download Complete Code
You are welcome to browse and use the test code. You can find this code at: Ethereum Project Manager on Github
Looking for a reliable tech partner? FAMRO-LLC can help you!
Our development rockstars excel in creating robust and scalable solutions using Django, a powerful Python framework known for its rapid development capabilities and clean, pragmatic design. FAMRO’s team ensures that complex web applications are built quickly and with precision—enabling businesses to focus on growth while we handle the backend complexity.
But that’s not all. FAMRO-LLC also brings deep expertise in blockchain development and smart contract engineering. Whether you’re looking to integrate decentralized logic into your applications or automate business workflows using Ethereum and Solidity, our team can design, deploy, and secure smart contract solutions tailored to your needs.
On the deployment side, our Infrastructure team takes charge with Kubernetes, the leading platform for container orchestration. Their deep knowledge ensures applications are seamlessly deployed, scaled, and managed in cloud environments. By automating service discovery, load balancing, and resource scaling, we guarantee high performance and resilience.
This powerful combination of Django development, smart contract expertise, and cloud-native DevOps positions FAMRO-LLC as your go-to partner for delivering end-to-end, scalable, and future-ready technology solutions.
Please don't hesitate to Contact us for free initial consultation.